Wednesday, July 30, 2014

Obey All The Rules!

It has been awhile, but it is a fabulous Artistic Outpost Blog Hop and the theme is designers choice, so be sure to visit all of the AODT for some gorgeous inspiration! Before I list all the talent, Artistic Outpost has a lovely SALE OF THE WEEK at 20% off in the "Flowers and Garden" section as does Our Daily Bread Designs, for "Flowers and Garden" stamps and dies and North Coast Creations.

Tracy  * Terry * Alison * Kate * Linda * Gerrie * Lisa

For my card I decided to use the lovely working girls from the Paperboy collection and teaming them up with stamps from the Secretary Pool and Quote and Quotables. The card size is a standard A2 and all the panels were stamped using Black Archival, heat set and then inked with Distress Inks, Walnut Stain, Antique Linen, Frayed Burlap, Rusty Hinge. Again I get so carried away that I forgot to take pictures of the background panels before assembly, but you all get the idea. I also spritzed and flicked water on all panels and then gave a little flick of Rusty Hinge stain using a toothbrush.

The girls image was lightly inked with Tattered Rose and Spun Sugar and I added some corners. Don't they look like after working that 9 to 5 job that they are ready to break a few rules? Well I believe so! I worked as a secretary/office manage for many years and I know what TGIF means!


Well I do thank you for stopping by today on this wonderful blog hop with Artistic Outpost! Have a fabulous day!

Thursday, July 24, 2014

AVJ and CC#3C!

How are you all doing on this fine day or evening! I decided to combine the current "Just Stain It" challenge chosen by that talent ball, Jenny at A Vintage Journey with the "Painted Industrial" current lesson over at Studio L-3, page 46 of Tim's Compendium of Curiosities III!
At AVJ, we are a totally Tim Inspired Challenge Blog and there is plenty of inspiration shared by my DT Sisters, so stop on over and check out their projects. Country View Crafts is our sponsor and for each challenge there is a winner of a £10 store voucher, so come on over and join in.
For my stained project, I first used Tim's Shattered Stencil and clear embossed and then applied Vintage Photo and Antique Lines Distress Stain over that. I decided to go a little darker and applied another coat of Vintage Photo which I thought looked better with the "Painted Industrial" pieces. Linda and the Curiosity Crew have some fabulous art to share and the lovely Joy and Inspiration Emporium is offering a generous $50 prize and a special prize from Tim and Mario.
Patterns and Stitches, Courtyard and Trellis Texture Fades were used along with the movers and shapers. Paper from the Menagerie stash was used for the card panel, which was edged with Black Soot stain and both the tag and card base was splattered with Black Soot and Vintage Photo stain. Also ran the Black Soot stain along the top stitch embossed edge of the tag. Used the On The Edge die for a little trim cut from the tags edge and again stained with Black Soot and then adhered. Black Soot paint was applied to the word band to finish off.
Again I thank you for stopping by to visit. If you are looking for a sweet deal, Saturday, July 26th, is the last day to take advantage of the 25% off sale on Christmas/Winter stamps at Artistic Outpost.


Monday, July 21, 2014

Christmas In July!

It is never too early to think about Christmas and Artistic Outpost has a 25% off sale on Christmas and Winter stamps, now through Saturday, July 26, 2014 11:00 PM EDT and so is Our Daily Bread Designs and they have Christmas paper and dies!! Whether you are thinking of starting your Christmas cards or gifts for those rubber stamping friends, now is a good time! Go have yourself a look!
What a better way to announce a Christmas sale than to make a Christmas card? Well that was my excuse to start early and have a little stash. For this card, I used Christmas Chalk and MidWinter and combined some bleach stamping and embossing.
Since I was looking for a more chalky background, but without the mess, I applied Black Soot Distress Ink over white paper and then did the bleach stamping. Before I did any inking, I stamped the Chalkboard frame using clear Embossing Ink and then applied powder. After all the inking was done and bleach stamping, I removed the EP via that iron. Layered up with green and red and tied it up with some twine! Pretty much a quick and simple card with a few layers for extra interest. In fact I am thinking this will be my main card to send out this year, but of course with mixing up stamps!
Thank you for stopping by today and joining me on my Christmas in July and go take advantage of a pretty nice sale! Oh and that Christmas paper at ODBD is gorgeous and works so well with AO stamps! Just Saying!


Friday, July 18, 2014

TGIF!

Are you happy that Friday is finally here? I sure am! Friday's are now my day at AO and I am sharing yesterday's post over at Artistic Outpost today, so if you missed it you can find it right HERE for all the details.

Also if you weren't here yesterday or visiting one of the other DT members, you may not know that Artistic Outpost is now open and having their GRAND OPENING, so stop by for all the details. One change I love is all the stamps will now come on cling mounting and precut! I don't know about you, but having to mount and cut is really hard on these old hands and I have better things to do with them, like getting inky!  Anyway, stop on over!

Thank you for stopping by and taking the time to comment. Have a wonderful Friday and great weekend.

Thursday, July 17, 2014

Down By The Sea!

I was so honored to have been chosen by the DT at Frilly and Funkie as a winner for their "Just Case It" and even more honored to have been asked to be a Guest Designer. The current challenge is "Cool Water" and here in the desert that would be quite a lovely treat! Here is my take on the challenge and I hope you will stop on over there! AND JUST TODAY ARTISTIC OUTPOST HAS ANNOUNCED THEIR GRAND OPENING, so talk about cool!
First I decided I would make and sky, ocean, sand background, so I started with the sand which was masked, inked using Gathered Twigs and then clear embossed. The embossing was to keep the next step of creating the blue ocean where it belonged and for the "cool water," I used Chipped Sapphire and Faded Jeans (worked darker at top to lighter on the sands edge) and again this was clear embossed. The sky was inked using Stormy Sky, Broken China, , Tumbled Glass and streaks of Peacock Feathers. Once I did the spritz and flick technique, I removed the embossing with an iron.
All stamps are from Artistic Outpost and I used the Boardwalk plate. The images were stamped with Archival Weathered Wood and Sentiments with Archival Black and then inked and or watercolored using Distress Inks. Great stamps for Summer Fun, which is the current challenge theme at Inspiration Emporium so off we go.

To finish it off I inked up some cheesecloth and had to add some seashells. Thank you for stopping by today and I hope whatever you are doing, you are keeping your cool!

Tuesday, July 15, 2014

Tim's July Tag of 2014

Fun, fun and lots of messy fun creating Tim's July 2014 tag and not one stamp was ever used in the entire process. Well I got to use plenty of new toys with this one, from the Bubbles and Waves embossing folder to using both Sand & Sea dies. I may have gotten a little "Seahorse" carried away!
For the most part did follow Tim's guidelines throughout the entire process, but used a few different colors.
For the tags background, I used Chipped Sapphire, Peacock Feathers, Peeled Paint and Antique Linen Distress Paints. I did skip the staining part as I had a good amount of paint on my tag and for the first time, did actually get a marbled effect I was happy with. The Distress Inks I used before the Spritz and Flicking activity were Evergreen Bough, Salty Ocean, Tumbled Glass.
The Seahorses were colored pretty much with the same as above. I used Vintage Photo stain after the RC crackle dries. I also added a little piece for the Tattered Pinecone die near the larger Seahorse.

Used the same recipe that Tim gave, but also a couple of pinches of Vintage Photo EP in the mix.
Thank you for stopping by today and I hope you are having a great week!


Sunday, July 13, 2014

Altered Clay Pot for AVJ!

Now there is an exciting blog post title! This is my first post for the "Destination Inspiration" at A Vintage Journey, so I hope you will click HERE for all the start to finish details and many more pictures. This was quite a work in progress.
I really did love how this turned out and it was fun project and one that can transform any old clay pot into something quite nice. Played with some new and old stamps and even a stencil!
Thank you for visiting and another round of thanks if you hop on over to AVJ! Enjoy the day and having some inky fun.

Saturday, July 12, 2014

CC#3C - Altered Burlap Panel

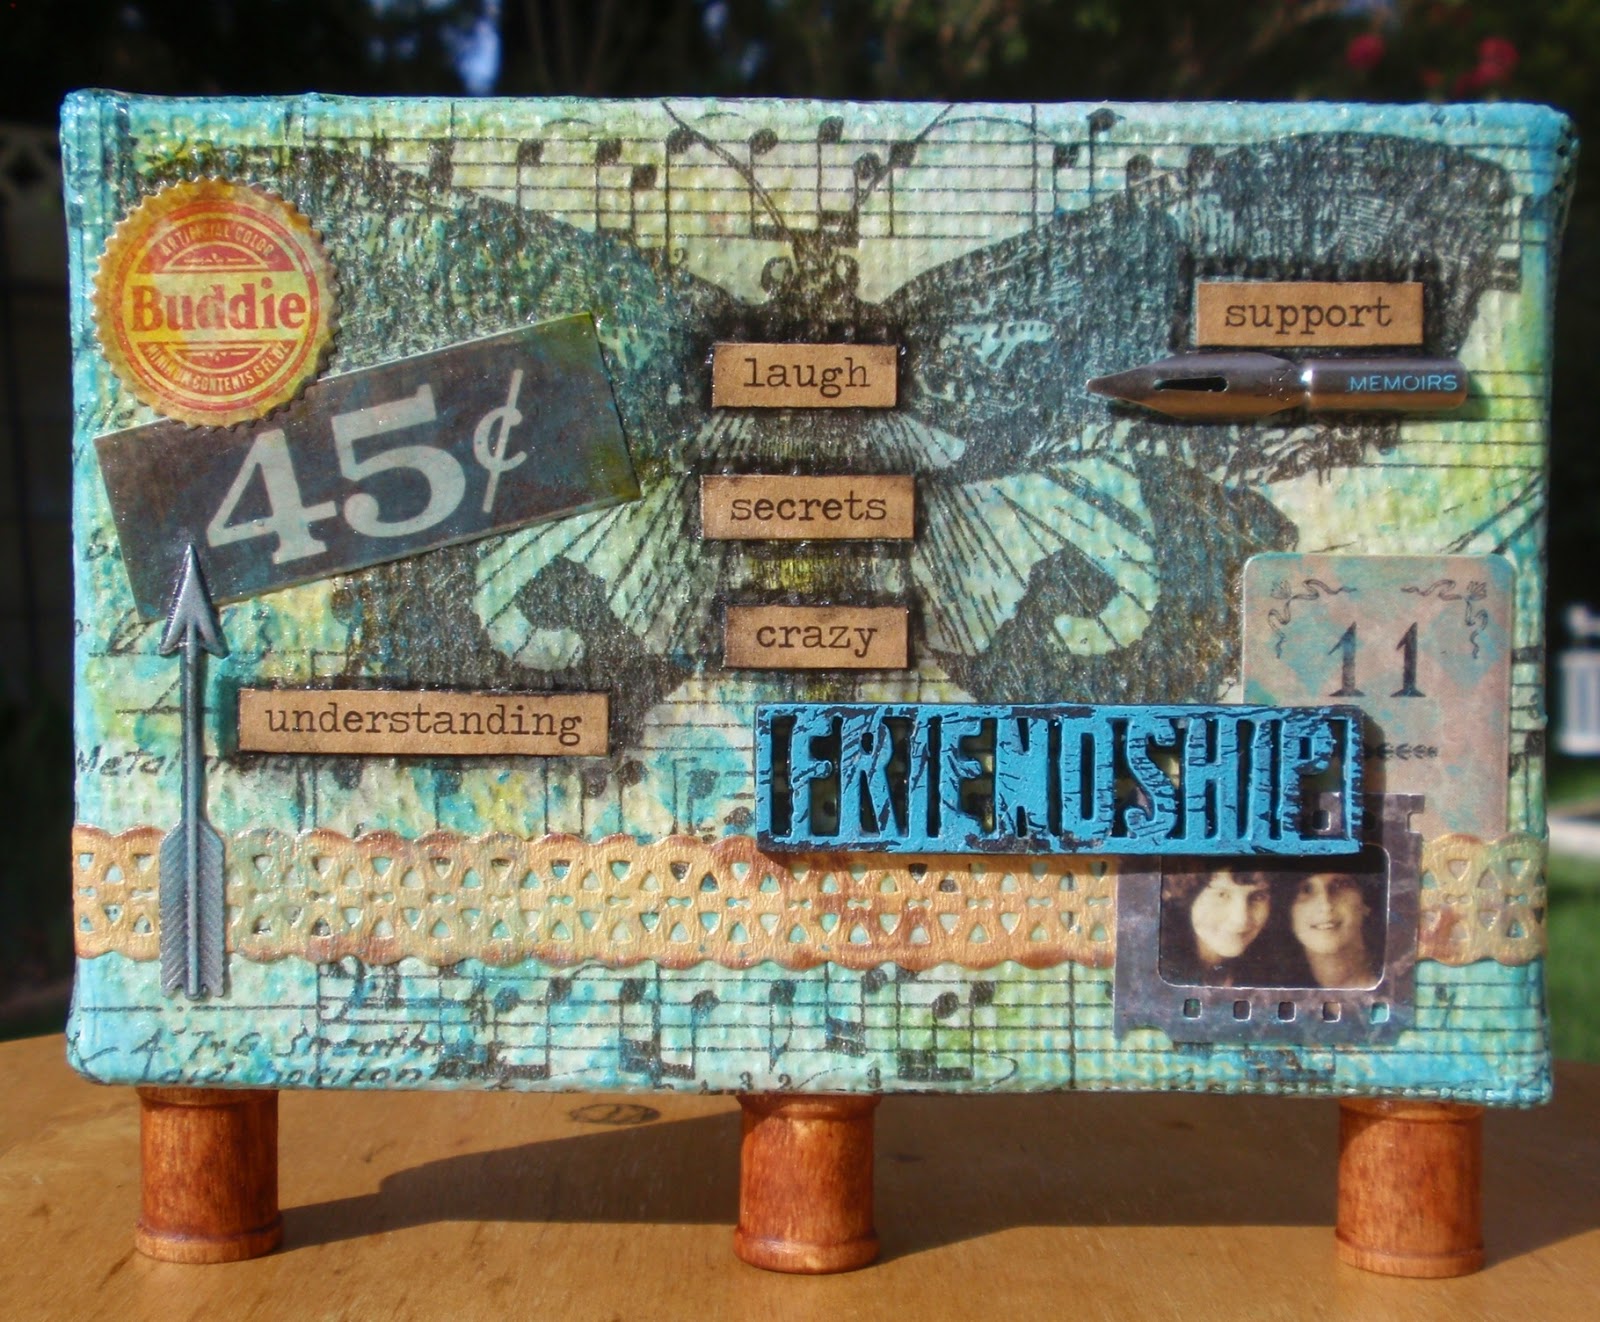
Open up your Compendium of Curiosities, Page 37, Lesson Altered Burlap Panel and Linda and the Curiosity Crew have us enjoying another chapter in Tim's fabulous technique book. The Funkie Junkie Boutique is the wonderful sponsor of this challenge and there is a little surprise for someone from Tim and Mario, so come on and join in!
As always we cannot give out any details out of respect for the hard work and time Tim puts into his books, so if you don't have the book, click above and have some fun while learning.
What I can tell you is that this Altered Burlap Panel is for my dear friend, who just had a birthday on the 11th and is more like a sister to me.


I had a great time searching for little embellishments to tie in our friendship over the last 14 years. It is amazing how friends can become so much like family.  All these little Chit Chat stickers are so true of the two of us and life's events we both share in common. In fact tomorrow we will be joining them for brunch and that is always a great time.
Thank you for stopping by on my creative journey with the Curiosity Crew!

Thursday, July 10, 2014

Laughter Is Timeless!

Dies and Distress is the current challenge chose by the fabulous Annie at A Vintage Journey! What a great line up of Tim inspiration my DT Sisters have for you, so you must pop over there for all the details. There is always a prize to be won from our sponsor, Country View Crafts and of course you could be among the "Pinworthies."

For my project, I decided to make a card using Tim's Pocket Watch dies and plenty of Distress products, along with stamps from Artistic Outpost, which with their vintage appeal work so well keeping in Tim style. First I started with a "Faux Batik" background that was stamped with the AO gears (Industrial Backgrounds) with clear embossing ink, powder, heat set. I inked over the surface with Peacock Feathers, Dried Marigold and Vintage Walnut. One thing I like to do after the Spritz and Flick water treatment is to dab your foam applicators over the wet spots. It just adds a little extra interest. When I was pleased with the colors and added a little subtle background stamping, I removed the embossing and inked over with the various colors, but mostly Antique Linen and Vintage Photo.

The Chalkboard Wisdom sentiment was stamped using Black Archival and clear embossed. I used Tim's water brush and Peacock Feathers DI to color in the banner, before inking and spritzing. For this piece, I wanted the water drops to remove color, so left well enough alone. The Pocket Watch was die cut using grungeboard and covered with Rock Candy Crackle. After it was dried, I inked over the surface using Peacock Feathers. I shaded around the edges with Vintage Photo Distress Ink and then applied some VP paint to my mat and with a tooth brush flicked on some paint.


The movers and shapers were done as above, except they were inked with Dried Marigold and flicked with VP and PF paint. For the spinner, I dabbed both paints and flicked on some thinned black and then covered with clear EP and heat set.


Both the stamped gear and clock from AO were stamped using Archival and clear embossed. I used Tim's circle movers and shapers and all just fits so well!


A few gears were added and one eBay find, some rub-ons, a Key and Word Band and all is happy!


I hope you have enjoyed your visit as much as I enjoy your taking the time to stop by. Have a wonderful weekend.

Blog Archive