Friday, March 30, 2012

Creative Chemistry 101 Day 10

Each day I have squeezed in the time to watch the new lesson of Tim's Creative Chemistry 101, but have only been able to play a couple of times.  Today there was only one tag, so I could not resist.  If you have not signed up for CC101, you still can as this is a lifelong class!  For this technique I used Tim's new background stamp and I do love it!  The bird was cut from one of Tim's Movers and Shapers and the birdcage, print and sentiment are all from Artistic Outpost's, "Birds of a Feather."  We are joining in Lisa's Bloggers Challenge - For the Birds , Beverly's "Pink Saturday" and Simon Says Stamp and Show A Tag.
Before I tell you about how I made the tag, Linda Coughlin, has a wonderful product review for Frilly and Funkie's Friday Focus.  It is all about altering Filigree Metal Embellishments, which are on special for 15% off and if you use MARCH10, you can take advantage of an additional 10% off.  I could not help but notice there were a few other precious metals on special, so go take a look and you might just see something you would like!  When I saw what she did, I knew what I would be adding to the top of my tag!  Let's face it I love the grunge, but also love to add a touch of pretty and these little pieces of metal are just that!
Altered on the left!  Cool!
I did my tag background via the instructions for today's CC100 class.  The little ribbon trim I colored using Tattered Rose Distress Stain and added some pearls.  The filigree metal, I colored with alcohol inks, then pressed into Worn Lipstick Distress Ink and then clear embossed.  I really liked how it turned out and have a not so good, before and after picture.  I stamped the birdcage and sentiment using two colors of ink as Tim did this AM.  Stamped the print background with Vintage Walnut on newsprint and torn. 

Well that is it for today and if you ever have any questions about something I did, please just ask.  As many of you know, it never bothers me to share something.  It is hard to put down every little thing and it would make for a boring read!  Just a reminder that the Frilly and Funkie Challenge Blog is having the first ever challenge and it is all about Your Favorite Vintage Style, so we would love to see you join in the fun!  I was so thrilled to see so many of my lovely blogging friends sign up as followers and can't wait to see you join in the challenges!  Have a wonderful weekend and thanks ever so much for your visits and comments!


Distress Inks: Worn Lipstick, Vintage Photo, Walnut Stain
Distress Stains: Picket Fence, Tattered Rose
Alcohol Inks: Mountain rose, Pearl
Distress Stickles: Rock Candy

Wednesday, March 28, 2012

Vintage Style at Frilly and Funkie!

Finally the first day of a brand new challenge and challenge blog is here and I am so proud to be on the design team for Frilly and Funkie Challenge Blog.  For our first challenge Frilly and Funkie are wanting to see YOUR FAVORITE VINTAGE STYLE.  There are so many ways to interpret "vintage" and for a great treat and a little extra inspiration stop by F&F and enjoy what the design team has in store for you!   All the information about challenge guidelines and prizes and be found HERE.  For a chance at a $25.00 gift certificate to "The Funkie Junkie Boutique," read all the details HERE.  I sure hope you like my first DT submission for my "Favorite Vintage Style" and we can't wait to see Your Favorite Vintage Style!
Guess I will start with what you see first!  I cut the dress form from grunge paper after covering with double sided adhesive.  Used a craft knife to gently cut areas on the cut dress form as I wanted to keep areas separate for the embossing.  For the bodice of the dress form, I used Tim's Mosaic Technique and then covered the grout area with Peeled Paint, removed the piece of paper for the waistband and added the gold and then finished off with the Vintage Photo.  Heat embossed and then added the Glossy Accents to the tiles.  The little spools, so darn cute, were colored using Distress stains and a tiny paint brush.
The cabinet frame was cut from grunge paper using the Vintage Cabinet Card and VC Movers and Shapers.  I followed the technique from Tim's CC#2, "Shattered Stains," page 48 for the frame.  I highly recommend this book!  For my background I used a natural ivory paper, which was cut from the Vintage Cabinet Card and clear embossed images from Tim's Haberdashery stamp set.  Once this was heat set, I inked all over with Distress Inks and a quick spray of Glimmer Mist!  Normally I would use my own mix of Perfect Pearls, Reinker and Water, but did not have a light color mix ready!  Used the patterns embossing folder, ran it through the Big Shot and then quickly highlighted the raised area with Stazon Timber Brown.  Covered this clear embossing powder and then heat set.  The inking and embossing process has to be relatively quick for the embossing powder to adhere.  Added the little vintage sewing goodies, place the cabinet on natural ivory paper and card base.  This was a fun, fun project!

Until the end of March, by using code "MARCH10," you can enjoy and extra 10% off Linda's already reduced prices.  There are so many unique and lovely products and a great collection of Ranger products with so many more arriving soon!  We all shop and sometimes until we drop, so take a look and you will be pleasantly surprised at the array of vintage goodness! 


Inks:  Distress Rusty Hinge, Broken China, Vintage Walnut, Bundled Sage, Stazon Timber Brown, Versamark Clear
Distress Stains:  Broken China, Bundled Sage, Wild Honey
Embossing Powders:  Stampin Up Gold, Distress Peeled Paint, Vintage Photo, Clear
Glimmer Mist Pearl
Rock Candy Crackle Paint

Tuesday, March 27, 2012

CC101 Day 7

I have to tell you that I am like way behind in the class, so decided to give today's a go!  Here is my take on Day 7 of Tim's Creative Chemistry 101, I did not embellish as these will be samples and go into a notebook.   Hopefully tomorrow I will do Day 8 and a couple of the previous classes.  The good thing is that it is lifetime, so there is nothing to lose!!  Linking this up to Simon Says Stamp and Show a Tag, well I have three! 
Now the really BIG news is that tomorrow is the launch of the very first challenge at Frilly and Funkie Challenge Blog!  To celebrate Linda is offering a $25.00 gift certificate to her store and let me tell you, there are some really nice items and so many more lovlies are on the way!  WooHoo, I tell you!  To qualify for the drawing, you must visit all of the NEW DT BLOGS and leave a comment  HERE  after you have finished.  Now that all the DT members have been revealed, stop by where there is a link to all of our blogs and comment, but don't forget to go back to F&F and leave a comment there!  Can't wait to see you tomorrow for the first F&F challenge. 

Saturday, March 24, 2012

Spring Is In The Air!

"Spring Is In The Air" is the newest challenge at the Fashionable Stamping Challenges blog, so come on and join us in celebrating that breath of Spring Air we all so eagerly await!  Oh my DT sisters have some really gorgeous creations to put you in the mood, so stop on by FSC and have a look and join in all the fun!  Don't forget there is always a little prize and you never know when you will get caught in the Spotlight! 
I don't believe I have ever used this older stamp from Stampin Up.  This little bird perched on her flowering branch is what Spring is all about.  The birds coming out to play and gathering findings for nesting material, flowers and bulbs in bloom and longer days is the best time of year!

This large image was stamped using Stazon Timber Brown and then clear embossed.  I used a soft pallet of Stampin Up chalks for color on most of the image.  Did use Certainly Celery and Yellow for the bird and vine stems.  After I was done coloring, I gave a quick spray of Matte Sealer to keep the chalks in place.  Distressed edges and inked with Distress Vintage Photo.  I really did not want to add any embellishments as I just love this image!

Thank you so much for stopping by for a visit.  I hope you have a wonderful Sunday!

I am Funkie!

I am so excited to announce that I am part of the new "Frilly and Funkie" challenge blog!  From the day that Linda sent me an invitation, I have had such a hard time containing my excitement, to be included with such a fabulous grouping of talent!  A big thank you, Linda!!  Today is my debut over at "Frilly and Funkie", but I wanted to give you a little peek!  Please stop by F&F to read all about the challenges, our reveals and to learn about "Giveaways."
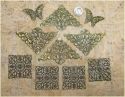
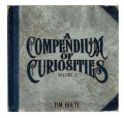
The tattered flower was cut from grungeboard and I used a new technique from Tim's Holtz, " A Compendium of Curiosities #2"  Out of fairness to Tim, I won't go into the details of this technique, but strongly encourage you to invest in the "book of knowledge."  I did adapt his idea to suit my purposes as I wanted to add color in a different manner. 
Now each day until the launch of the first Frilly and Funkie challenge on March 28th, there will be a new DT reveal!  Please stop by each of the DT's blog and comment for a chance to win a generous $25.00 gift certificate to Linda's Funkie Junkie's Boutique.   There will be blog challenge prizes also, so come on and play along with us Frilly and Funkie gals!

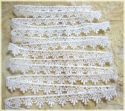
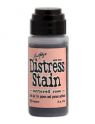
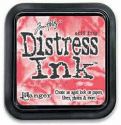
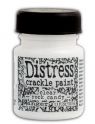
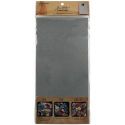
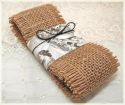
Tim's Book, Grungeboard, Inks, Stains, Rock Candy Crackle, Tissue Wrap, Vintage Lace die and Filigree Metal can all be purchased at Linda's ZIBBET store.  Now not only are these products priced below MSRP, but if you use this coupon code MARCH10, you will receive an additional 10% discount.  There are some really unique items as well as the many needed products. 

On a personal note, I am very sorry for my lack of blogging over the last week plus.  I was really hit hard with a nasty flu bug that just would not go away and wiped me out.  Don't think for one minute that I won't be making it up to you as now I am feeling better and am catching up on all my DT work!  Hugs to all of you and have a fabulous weekend!

Wednesday, March 14, 2012

Springpunk in Plaid!

Linda is taking us all the way back to Tim's 12 Tags of Christmas 2009, Day 3 and we are making plaid backgrounds!  This was super easy and fun!  The kind people of Simon Says Stamp are sponsoring GM39 and offering a $25.00 shopping spree and as luck would have it, the challenge at Simon Says Stamp and Show is "Anything Goes."  Artistic Outpost also has a fun and unusual challenge for  "Springpunk."  Now that is a first!


All stamps are from Artistic Outpost and I used Bird's of  A Feather and Whimsical Melange for the clock face which was stamped and clear embossed.  The gear is Tim's as are most of the embellishments.  The feathers were gifted to me by my bird, Fred!  The bird background panel and clock gear were embossed with one of Tim's embossing folders and then embossed with a garnet powder.

I was the lucky recipient of a surprise blog candy anniversary over at Yvonne's Journey into Artistry and as if the candy was not sweet enough, look at this beautiful card she sent along.  If you have not been to Yvonne's blog, take the time to stop by for a visit.  Thank you so much, Yvonne! 
Well I would like to thank and welcome my 35 new followers and if you have not signed up for my blog candy, now would be the time.  Your visits are always appreciated and I thank you!

Saturday, March 10, 2012

BINGO at FSC!

At Fashionable Stamping Challenges, we are playing "Bingo" and you can pick any row, vertical, horizontal or diagonally.  For my row, I went diagonally from left to right using "metal, distressing and vintage."  We would love to see you take on the "Bingo" challenge, so come play along!  For more ideas and wonderful inspiration, stop by FSC and check out the fabulous creations of my DT Sisters!  Don't forget there is always a prize!
Before hitting the bottles!
Well as you can see, I decided to hit the bottles with this one and had quite a sobering experience in the process.  I have had these lovely vintage perfume bottle stamps from Lost Coast Designs for a couple of years and thought how perfect for the "Vintage" part of my Bingo Card.  I stamped these with Timber Brown Stazon Ink and then clear embossed.  Yes, Stazon gives a nice embossing touch!  I then did that fussy cut thing that we all enjoy so much!  For my background, I played along with Grungy Monday's #38 which is a Dauber Paint resist using a technique from Tim Holtz and you can see that HERE.  Now I have to be honest and say that I followed the technique, but made a couple of changes and did not stamp over the print from one of Tim's new background stamps (Wallpaper).  After the paint dried and I just fell in love with the Copper sheen, so new I would not be stamping on that.  I swiped a bit of Dried Marigold and Frayed Burlap DI and sprayed a Perfect Pearls mix over that(antique linen reinker, pearl perfect pearls) on the craft sheet.  Pressed my tag into the mixture and then quickly dabbed off the excess ink/spray.  I then gave a couple of quick sprays of Hot Chocolate Chalkboard from Tattered Angels.  All edges are distressed and shaded.  For my metal, I added a key and some chain to the top and bottom of the tag.  Simon Says Stamp and Show is looking for "Bottles," so we will be linking up over there as well!
Thank you so very much for taking the time to visit and comment.  I know how time consuming that can be, so trust me when I say that you are all appreciated.  Hope you are having a wonderful weekend!  I am so excited and hopefully will have something to share really soon and then tomorrow is the stamping convention in Carson and I will get to see what Mr. Holtz is up to! 

Friday, March 9, 2012

Loving Green!

Eye can see clearly now!  OK, silly that was, but I could no resist!  Speaking of resist, there is quite a bit of that going on here and some masking!   Several shades of green Distress Inks were used and various stamps all of Mr. Holtz!  BTW, how many of you are attending the "Creative Chemistry 101" class?  I don't care what your style is, you will learn so much from the "inking" genius!!  "Go Green" is the challenge theme at Inspiration Journal and since I had so much trouble getting the green to show up in my last entry, I felt another was in order!  She is also going for a visi at Lisa's "Bloggers Challenge" who is looking for 3-D, which I think the eye does have!!  Gingersnap Creations GC140 is "Two Colors" and I have green and black.
The first thing I did was to stamp the eye with Black Stazon and then I covered it with a mask (which I had saved from previous use).  I then stamped the eye sign with embossing ink and clear EP.  Did bits of stamping and even used an inked embossing folder for added interest and then flattened it out.  I added a little color to the pupil of her eye and a touch of eyeliner!  Cut some trim for the background tag from the pinking On the Edge die.  Shaded and distressed all edges.

Well I am going to "A Stamp In The Hand" convention this Sunday and Mr. Holtz will be there and yes, I am so excited.  I have seen him in action a few times and can honestly say, "WoW."  Hope you all have a great weekend and don't forget to join in my Blog Candy  anniversary celebration!   Thank you for stopping by!

Monday, March 5, 2012

Celebrating Two Years Of Blogging!

How time flies and it is hard to believe that I have been blogging for two years.  Even more amazing are some of the wonderful friendships that I have been blessed with!   This is something we all do for the love of the craft, but we receive that extra benefit of friends and a ton of knowledge along the way.  Before I tell you about my blog candy, which is as sweet as can be, let me show you my tag! 
What a coincidence that Mr. Holtz decided to use one of his new wood background stamps for the March 12 Tags of 2012, just as mine arrived so quickly from Inspiration Emporium!  And as the luck of the Irish would have it, Inspiration Emporium is Going Green for their monthly challenge.  Gingersnap Creations GC140 is for Two Colors.  Other than the stamped woodgrain and sentiment, all colors used are greens.  That would also include my glitter grout.  It was very difficult to capture the greens in my tag background, but green is there!  The entire background was inked with Distress Inks, Shabby Shutters, Peeled Paint, Forest Moss and Pine Needles.  I just love these butterflies and how with that added Glossy Accents, it really looks like mosaic tiles!  Fun, Fun, Fun!
Now for my blog candy in celebration of my Two Year Anniversary and today just so happens to be our 29 year anniversary, this is what I have for one of my fabulous followers!
Cool or What?
When I saw Inspiration Emporium were/are having a Pre-Order offer, I placed my order.  Who can resist 10% off and free domestic shipping to boot, which is still going on by the way.  Then I thought that someone out there would really love a set of these new Distress Markers and with my blog anniversary fast approaching, I asked if it would be possible to pre-order two sets and the answer was obviously, YES!  So all you have to do is to comment here and be a follower of my blog.  It is that simple and if you would like a second chance at winning, add my giveaway on your sidebar and let me know that you have done so.  This Blog Candy will end at midnight March 31st and I will announce the winner on April 1st. 

Again I want to thank all of you who are followers and take the time to visit and comment.  You never know what those little comments can do for someone!

Friday, March 2, 2012

To Have and To Hold!

For two days I struggled with what I was going to make my hubby for our 29th wedding anniversary.  One thing I had decided to reorganize that room and then everything was a mess.  Originally I had planned on showing this Monday with my Blogaversary post on our actually wedding anniversary, but then thought, I really needed to rush this over to Simon Says Stamp and Show An Idea-Ology Bonanza.  Well I have 11 Idea-Ology pieces, so I believe that is a Bonanza!  Gingersnap Creations GC139 wants us to use a "Faux Technique" and I used the Faux Batik and what I call a Faux Metal on the die cut gear.
As always, I never truly have a plan and more like a vague idea.  I love people who actually are so organized that they know exactly what they are going to do.  It must be nice, but it is so not me or certainly not when it comes to this!  My "Bliss" was cut from one of Tickets and I cut a background just the size to fit in the frame from Chocolate Chip, embossed this, highlighted the raised area and clear embossed.  I then centered the "Bliss," glued down and added several coats of UTEE.  The little chain was a black pearl like finish and I colored that with alcohol inks to blend in with my copper tones.  All stamps, embellishments, dies and most inks are Tim's.  For the faux part of the background, I used some letters/numbers, which was later ironed away.  I also cut a second tag from chipboard and a third from plain card stock for the back.  I wanted this to have a little strength to hold up to all the heavy metal!
Thanks a bunch for stopping by and I hope to see you all on Monday for my Blogaversary!  It has been an amazing adventure and all of you have made it so worth it!

Blog Archive