Monday, December 31, 2012

Happy New Years!

OK, it is still New Year's Eve here, but not around the world!  My wish is for all of you to have the best of everything in "2013."  I will soon be starting my 3rd year of blogging and am just amazed at all the wonderful friends I have made and knowledge I have acquired and not to mention inspiration!  A big thank you to all my followers old and new, you make this adventure so awesome!  So here we go with my last post of "2012." 
The current challenge at Fashionable Stamping Challenges is to "Surprise Us" and this is a pretty much anything goes, but must have stamping!  All stamps are Tim's.  No digis are allowed and there is a prize from Cottage Crafts and also a Top Three award, so stop on over and see what my amazing DT Sisters will surprise you with!  Now this is a surprise and is heading to Mr. Holtz, via Linda's CC2C "Finale" a birthday card for Tim!  Now is that not a scary thing to make a birthday card for someone who is the #1 inspiration to you?  We are suppose to use a favorite technique and for this I did the "Spritz and Flick Distress."  Happy Birthday to Mr. Holtz and many, many more!  And speaking of parties, Simon Says Stamp and Show has "The totally mad (no rules) tea party" and I suppose this is kind of an un-birthday or at least I am breaking the rules! 
The clock and "TH" were cut from card stock covered with foil.  I applied alcohol inks in layers with UTEE, until I was satisfied.  I found that the Copper Mixative gives a nice rusty kind of look.  I even did this to the copper color brads.  The metal pieces were also alcohol inked and clear embossed.  For the background I used Tim's Kraft Resist paper, stamped some swirls and clear embossed and then that was ironed away after I did my distress inking.  Cut out some "Typeset" letters and all was good to go! 

Have a safe and wonderful New Year!  Thank you for stopping by and I will be by to visit you next year!  Hugs!

Alcohol Inks:  Ginger, Latte, Mushroom, Copper and Gold Mixative
Distress Inks:  Tea Dye, Vintage Photo, Walnut Stain, Rusty Hinge, Peeled Paint

Monday, December 24, 2012

MERRY CHRISTMAS!

The big day is almost here and I hope you are all ready!  I finally finished the last of my shopping yesterday and today I will wrap it all up!  The dinner is made - LASAGNA and ready for the oven!  If all goes well, there will be some extra time for COOKIE making!  Onto my card and the final Christmas card of the year and the last lesson from the "Compendium of Curiosities."  Linda saved the "Glazed Mosaics" on page 60 for the last CC2C and that makes 34 techniques!  A big "thank you" to that loved lady at Studio L-3 for giving so much of her time and inspiration!  You really do rock!
I so love Tim's "Toy Soldier" and knew this guy would be used on a card for my wonderful husband.  Almost any time I use a die that requires an "EYE," that hubby of mine will tell me that I should have used one of the googly/wiggly eyes, so baby, this one is so for you!   The TS was cut from grunge board.  The face, gloves and pants were painted with white acrylic paint, shaded with Walnut Stain.  I added a little color to the face using Tattered Rose.  The hat and jacket were painted using red acrylic and gold touches on hat, jacket, shirt, boots and belt with Tarnished Brass Metallic stain - love those stains!  The background stamp is from Stampendous, inked with Peeled Paint and Festive Berries and I embossed that using Ranger's Black Sparkle, which has a great sparkle effect - trust me!  You might be able to see a little bit!  For the "Glazed Mosaics" which I can tell you about the Tim's technique, I will tell you that I adjusted slightly.  I used a movers and shapers and glittered my foil!  OK, enough said! 
I wish you all a most Merry Christmas and all the best in "2013."  Thank you for being a part of my little world.  I so appreciate each of you!

Wednesday, December 19, 2012

Make It A Tag!

Since it was my turn to host at Frilly and Funkie, I decided to go with the theme of "Make It A Tag" in the spirit of Christmas, Holiday Season or Winter!  The Frilly DT have already had a go at this and now the Funkie DT is showing off their tags, so go have a look for great inspiration and join in all the festive fun!  There is a $25.00 gift certificate to The Funkie Junkie Boutique, which is redeemable once Linda reopens the store and a chance to display the winner's badge!  This is the last challenge of the year and I sure hope to see you there! 
 
I started out with Tim's, 
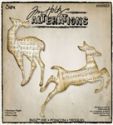
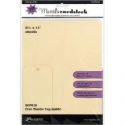
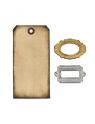
December 12 Tags of 2012 in mind and went with the tag in which he used the Poinsettia die, which I absolutely love!  Well after I finished with that, I thought I better do the other tag!  No extra time available, as I still have Christmas shopping, but could not resist!  For tag #1,  I pretty much followed Tim's instructions.  I used a smaller tag, so die cut the ticket, inked it up and stamped with black Archival.  This was mounted on the Christmas Kraft resist, which I colored in the holly leaves and berries using an applicator.  I colored the belt and harness on the reindeer using Metallic stain.  This tag was made for my DT project at Frilly and Funkie, but like I said, I could not resist making the second tag!!
Tim's 12 Tags of 2012 - Done
 
Tag #2 is for CC2C #33 and Linda has us getting sticky with "Tissue Tape" on page 36 of Tim's book and Simon Says Stamp is the sponsor with a $25.00 gift certificate.  Can't tell you about the technique, but I can tell you to buy the book and for the snowman stamped on the ornament, Tim covers that quite nicely on his blog!  I can tell you that I used quite a bit of "Broken China" (ink, marker and stain) on my collaged tissue tape background and snowman!  Oh I almost went blind coloring in that tiny little hat!  This tag with "Joy" in mind will also be linked up to the "Inspiration Journal" for the "Joyful Creations" challenge.
On a personal note!  I have to get moving on Christmas and did finish the last of my cards, which need to be mailed by tomorrow!  I went to Portland, OR for only a few days.  We had decided that the pets are getting too old to leave with others, so hubby stayed home!  To make a long story short, that old bird of mine must have pouted and did not eat hardly at all!  He seemed a little mopey when I returned, but by morning my hubby told me it did not look good!  It did not look good at all!  I spent the entire Wednesday holding this old bird, Fred and believed he would pass.  Birds don't lay down.  It took a few days and he got a little better and now he is back to where he was.  One more day and I am sure he would not have made it, but I am happy he will be here for another Christmas! 

With this being such a busy time of year, I am even more thankful that you would take the time to visit me and comment!  I wish you all a Merry Christmas and the best of the holiday season!

Distress Stains - Metallics Pewter and Brass, Barn Door, Broken China
Distress Inks - Walnut Stain, Festive Berries, Peeled Paint, Mustard Seed, Broken China
Distress Markers - Barn Door, Peeled Paint, Broken China,    

Saturday, December 8, 2012

Snowman Canvas

Happy Saturday and that brings us to my Saturday StepXStep for Frilly and Funkie!  This was a fun project and will go to my daughter, who does not read my blog, so it will be a surprise!  For all the details and pictures, please visit Frilly and Funkie
This was really fun and something I will do more of!  Finding time to do new things is not always easy, but I am going to start!  So are you all ready for Christmas?  No, I am not either!
Thank you so much for visiting me today and I would love, love, love your feelings on this canvas.  Have a wonderful weekend!  I am flying to rainy Portland to visit my daughter and grandson for a few days, so I will be catching up to all of you on Wednesday!  Just maybe the Sun will shine while I am there! 

Wednesday, December 5, 2012

Lighting the Way!

My DT Sister, Rebecca has asked us to use "Light in the Darkness" at Frilly and Funkie.  Even though Linda has temporarily closed down her little boutique, there is still a $25 gift certificate that can be used upon her reopening, so come on over and shed some light!  For more details and illuminated inspiration from the DT, stop on by Frilly and Funkie!
The entire background for my Light House is using Tim's, "Ink Palette: Distress" technique for CC2C #31 as instructed by that lovely lady at Studio L3.   Linda is just amazing and so sweet to devote her time to us each week and she even holds down a real job!  What a gal! 

Do you not love that background stamp???  It is from Stampendous and I have to tell you, it is gorgeous!  Actually it was pretty time consuming to color in each leaf and Poinsettia bract/petal, but worth it.  After I finished with the technique, I antiqued it using Frayed Burlap and Vintage Photo for the distressed paper edges.  The Holly/Berries were colored with Bundled Sage and Worn Lipstick stain and then Stickled with Yellow and Xmas Red.  The grunge paper cut Lamp Post was colored with Black Distress stain, scrapped up with scissors and then inked over with Frayed Burlap and then clear embossed.  I added some highlights using the Bronze Metallic Distress Stain.  My glass is Yellow stickles and Glossy Accents layered between two pieces of waxed paper and then cut to size.  Did a little Yellow Stickles garland.  I also glazed over the poinsettia with a mix of Rock Candy Stickles and water, to just give the red a little extra sheen. 

Hope you are having a wonderful week!  Thank you so much for stopping by!

Saturday, December 1, 2012

To Die For at FSC!

The newest challenge at FSC is "To Die For" and DT Sister, Joanna, chose this theme.  How fun is this challenge in which you can use die cuts, cut your own dies or even punches!  Just remember to include stamping along with your choice of "Dies."  There is always a prize and a Top 3 selection, so come on and join in!  All of us at FSC, love to see you and your fabulous creations!
The embossed background on mine was actually a leftover from a previous "CC2 Challenge," so that was my canvas!  I wanted to have a good portion of the background visible, so opted to go with shrinking my "Die Cuts."  This is what I did with the little ornaments and deer!  The ornaments were cut from white shrink plastic, stamped using Tim's stamps and Perfect Medium.  I then colored them with Perfect Pearls and baked.  Once heat set, I went over them with alcohol inks and blending solution.  The deer was cut from frosted shrink plastic, blended on Distress Ink, stamped the other side with Metallic Distress Stains using a snowflake stamp of Tim's.  I did add a little color to his nose and an eye.  All of these were coated with clear embossing ink and powder and heat set as well.  These were all baked in my toaster oven.  Added some red/white bakers twine for a more festive touch!


See the little baby snowflakes!
Hope you will join in with all the fun!  Have a wonderful weekend and thank you so much for stopping by!

Tuesday, November 27, 2012

Reflections!!

How are you all doing?  I have been a little MIA as my DH took some time off last week and being Thanksgiving, we did some much needed things around the house!  Well anyway, I can now get back to playing a bit!  That lovely Linda from Studio L-3 has us opening our "Tim" books to page 55, for lesson #30 of the CC2 - Reflective Imagery!  This is not a favorite of mine as I think I pretty much stink at this!  I don't know if it is the images I chose or that I do something wrong, but this is the best I have ever come up with!  Now it is very hard to capture the picture with all the shimmery effects, but it is there.  The lighting was not so great as it was overcast and I also took this much later in the day!  I am also linking this up to Lisa's Bloggers Challenge, "Countdown to Christmas."

We can't tell you about the technique, but I can tell you that I edged the fragment with gold embossing powder.  The background was embossed with Tim's Damask EF and highlighted in Gold EP, as was the ticket!  The lace trim was dyed with the Bronze Metallic stain.  All paper edges were highlighted with the Metallic stain - so cool those are! 

Hope you all are having a great week and getting ready for Christmas.  The plan is to pull out more decorations compared to the last few years, so I need to get cracking!  Thank you so much for stopping by today! 

Wednesday, November 21, 2012

Special K

One week left to join in the "Chipboard and Metal" challenge at Frilly and Funkie!  Marjie chose the challenge theme and she says anything goes as long as your project includes both chipboard and metal.  So are you ready for this???  My chipboard deer is from a recycled box of Special K.  In the spirit of Christmas and CC2C #29, Linda has us at page 64, of Tim's book, "Texture Fades" techniques.
After I cut out my sweet little deer from the Special K cereal box, I cut out a couple more shapes in black to use as a highlight.  I ran a  pen line of Spica Black Glitter along all white areas for a little pop.  His eye is Black Stickles and I covered the black brads as well.  The tree was silver and I covered that in a green glitter embossing mix.  The white snowflake was covered in embossing ink and white embossing powder.  The embossed background, I followed (mostly) the steps on page, 64. For my inking, I wanted a more candy cane kind of thing.  After I was done, I wanted a bit more white on my raised areas and inked over that with clear embossing ink and then white embossed.  This is one time that I like when embossing powder lands where you don't want it, kind of gives a little snowy feel! 

The Funkie Junkie Boutique is currently having a 10% off "moving sale" through the 23rd, should you want to pick up some nice deals! 

Saturday, November 17, 2012

Home Sweet Home!

My DT Sister, Yvonne, has chosen "Home Sweet Home" for the current challenge theme at Fashionable Stamping Challenges.  With Christmas fast approaching, I decided to go with a Vintage Christmas theme.  Really stop by and see what my Teammates have created, because there is so much stamped inspiration for your viewing pleasure.  We are a stamping challenge blog, so pull out those rubber babies and get inky with us.  You may be the winner of a prize from Cottage Crafts or make it into our "Top 3" selection. 
All of my images are from Stamping Up and sadly ones I don't seldom use.  I love their older stamps, which most of these were eBay wins.  For my "Home Sweet Home,"  I wanted a viewing window.  Not to be "Peeping Tom," but I really like driving around and seeing Christmas trees through open windows.  Now I can honestly say, I have never had the pleasure of seeing that Man in Red.  How cool in our little creative world, that we can!  All images were stamped with Archival Sepia and clear embossed.  I cut a window pane from the "snowflake" picture frame (what a pain, but worth it), inked over it with Distress Antique Linen and then clear embossed the entire frame.  For Santa and the Christmas tree, I just added bits of color with Stampin Up chalks, metallic pencils and Spica Glitter pens.  When I was satisfied, I gave this a quick spray with Matt Sealer.  Added my favorite little Christmas lights and some tinsel.  It took a bit of time to color in the objects, especially with old eyes looking at very tiny objects, but I just could not leave it uncolored.  At first I was just going to add a splash of color on Santa's suit, but just could not leave it at that.

Sure hope you will join us at FSC.  Thank you for stopping by and I hope you are getting into the Holiday spirit.  Have a wonderful weekend! 

Friday, November 16, 2012

Friday Focus with Metallic Stains

TGIF, right?  You better believe it!  It is this Funkie girls turn to do a Friday Focus at Frilly and Funkie and Distress Metallic Stains is the product of choice!  If you would like more details, hop on over to Frilly and Funkie.  You have to love Tim's products and I really hope he will add more colors to the Metallic line.  I love these stains!

Hope you have a wonderful weekend and thank you so much for stopping by today.  It is always a pleasure to have you visit!  Enjoy!

Thursday, November 15, 2012

Thankful!

This week I have had four different projects going on and someday I will be organized enough to work on one thing at a time!  What happens is that I get an idea for one and go to it, before I have finished with the previous!  Oh well, I don't think that will change and that is OK!  This is my take on Tim's 12 Tags of 2012 - NOVEMBER and I am also linking this to the Inspiration Journal's, THANKFUL
For the tag image, I used the flower branches from Tim's Spring Sprung stamp set.  Since I do not have the stamps Tim used, for the sentiment on the side, I used his embossing folder and kind of did my own diffuser system to just have "Blessings."  The beautiful leaves were gifted to me by my sweet friend, Vada.  I thought these were just perfect for the corner.  I did cut the acorns and branches from the Sizzlits strip and these were covered with Rock Candy Crackle (after inking) or clear embossing powder.  The back panel was inked, embossed and then highlighted.

Well there are many blessings in our lives to be thankful for and this "Thanksgiving," I am going to start counting those blessings.  I am thankful for all of you who take the time to stop by and commit, as the comments really lift my spirit!  Thank you!

Wednesday, November 14, 2012

Reflections Without Ink!

OK, well that is  to "Stamp Without Ink" at Simon Says Stamp and Show or at least not traditional ink pads.  As luck would have it, Simon Says Stamp, is also the sponsor of this weeks #28 CC2C at Linda's lovely Studio L-3, so I will be linking this up to both!  Linda has chosen, page 65 of Tim's book, "Reflections Stamping."  You know I can't give details, but I will tell you that I used Distress Metallic Stains, "Brushed Pewter" for this technique!  Here it is and I hope you can see the sheen from the Metallic stain!
The snowflakes in the background were stamped using the metallic Brushed Pewter stain.  The reindeer (after following the instructions on page 65, minus the use of an ink pad), was stamped directly on my background!  The background was inked with Distress Festive Berries, Vintage Photo and edged with Walnut Stain and then the magic of Water Spritz took place.  I used the Barn Door marker for the calendar and sentiments stamps, which were cut out and Walnut Stain marker for the crackle stamp.  All stamps are Tim's .
Many thanks to Linda, Simon Says Stamp, Mr. Holtz and especially all of you for stopping by to visit!   Have a wonderful rest of the week! 

Wednesday, November 7, 2012

Tic Tac Toe

Tic Tac Toe is our current challenge at Frilly and Funkie and you can chose whatever line your little heart desires, so come on and play along!  The Funkie side is up this week, so if you have not been by to see what the Frilly gals have done, you are in for a double treat!  There is a winners badge and a $25.00 gift certificate to The Funkie Junkie Boutique that two lucky winners will receive, so come on over and join in the fun.  Now I am combining my DT project with the current CC2 #27 challenge over at Linda's Studio L-3, "Ink Palette: Alcohol Ink" page 52.  This is quite fun and I can't tell you about the lesson, but I will tell you that Tim's book really rocks, kind of like the man! 
I chose Metal, Alcohol Inks, Glitter
First I inked up my paper with Pine Needles, Dusty Concord, Tumbled Glass and did the water spritz.  All shading was done with Walnut Stain.  The stamped images are all Artistic Outpost and were stamped with Archival Coffee.  This tag will be linked up to AO's November Referral Program.  The leaf background on the tag was done using a stencil from Dylusions, by mixing Lumiere Pearl White paint and a drop of Pine Needle reinker.  I also edged the main tag with the mix.  It really has a beautiful sheen, but as always very difficult to capture.  I did blend a bit of the Walnut Stain over the tag and wiped off excess.  I wanted to add a extra layer of color.  For the Glitter part, I applied Glossy Accents and sprinked some Stampin Up Dazzling Diamonds! 

Thank you so much for visiting today and have a wonderful day!


Blog Archive