Friday, June 8, 2012

Friday Focus with Color Wash

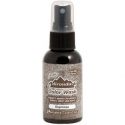
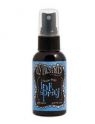
Here we are with another Friday Focus at Frilly and Funkie and this time around, it is my turn.  I have never used Color Wash sprays, until recently and decided to give them a try.  More details and information on how I created these projects can be found on the Frilly and Funkie Challenge Blog.  Remember this product will be discounted an additional 15% off  Linda's already low prices at The Funkie Junkie Boutique.
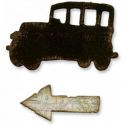
 I experimented on Paper, Fabric and a Clay Pot.  For the tag and T-shirts, I made my own foam stamps using black foam and thin cling mounting foam.  I personally prefer the cling as it is permanent and works like any other stamp.  For the tag, I wanted to keep it very simple and without bulk, but still wanted layers of images. The mini jalopy and arrows were stamped with Color Wash. I added the color using paint brushes and I can see so many ways to go with these sprays. 
Again stop by F&F for all the details.  Oh and if you are interested in Dylusions Sprays, Linda has the complete set for $45.00 (not counting shipping).
Thank you all for stopping by and hope to see you join in this week's "Kraft and Twine" challenge.  Have a wonderful Friday!
                                      

Wednesday, June 6, 2012

Kraft and Twine

Once again it is the Funkie DT turn at Frilly and Funkie and the current challenge is Kraft and Twine.   Please stop by Frilly and Funkie for more inspiration from both the Frilly and Funkie side and for all the details.  There will be a random draw prize of $15 to the Funkie Junkie Boutique for one lucky challenge taker and a Funkie Favorite badge to display for another!  Come on and join in!
For my tag, I started with the jumbo size manila tag!  I wanted room to spread out and this is such a great size for that.  I first stamped a few images from Tim's Haberdashery collection used clear embossing ink and clear powder, to later be removed via the iron.  I then placed my Dylusions stencil over the tag and sponged in the Dylusions Ink Spray color, yes I wanted to control my spray.   Moved the stencil around the tag to make a border.  Once dried, I then applied Distress Inks, stamped more images with Red and Brown Stazon.  The buttons were die cut and also sprayed with Dylusions and tied with twine.  The dress form after cut was inked with Vintage Photo on the side and over the raised areas of the corrugated cardboard.  I will also link this up to Simon Says Stamp and Show Some Texture. 

Many thanks for stopping by today and I sure hope you will join in all the fun at Frilly and Funkie!

Saturday, June 2, 2012

Mystical and Very Magical

My mind did wander off into the land of "Make Believe" with the newest challenge at Fashionable Stamping Challenges.  The stamps I used are from Stampin Up and are pretty old ones at that.  I remember bidding on these on eBay, because I thought they were so full of magic and imagination and just felt I had to have them!  Here is how this came together and I sure hope you will pull out whatever "Mystical and Magical" stamps you have and join in this fun challenge, where we get to be kids for a day!  Please stop by FSC, because I know you will want to see what my magical DT Sisters have created and don't forget there is always a prize!
I stamped my images on manila paper using Black Stazon and then colored the images using Stamping Up Markers.  Went over some of the colored areas with Spica Glitter Pens, which the little extra shimmer does show through.  After that dried, I covered all stamped and colored images with the VersaMark Pen and then clear embossed.  I wanted the extra little 3-D effect!  I also stamped some extra mushrooms and the bird, cut out and glued down.  I then colored a background stamp with Distress Inks (Antique Linen, Bundled Sage, Stormy Sky, Tumbled Glass), by rubbing the ink pads directly onto the stamp.  After that was done, I quickly used the blending tool to move some color, gave it a light spray of water and stamped over the images.  The back panel was freezer paper I used alcohol inks on some time back to use as a gift wrap!  So that was actually recycled and I cut a couple of mini butterflies to add.  The metal was embossed and tied down with some threads and then I added a mix of  chunky/fine glitter, seed beads and micro beads using Glossy Accents.
Thank you so much for stopping by and I sure hope to see you at FSC!  Have a great Sunday!

Thursday, May 31, 2012

A Triple Play!

Oh boy I am just sliding in without much time to spare!   Lisa's Bloggers Challenge is all about color and I do love Brown and Green.  Inspiration Emporium's challenge at the Inspiration Journal is Bring on the May Flowers.  Last and certainly not least, Linda's  CC2#7 challenge is Brushless Watercolor, to be found on page 49 of Tim's fabulous book.  Again, we can't tell you about the technique, but I did it on two neutral backgrounds with a green and a brown color!   Daisy of Eclectic Paperie is offering a very nice $25.00 gift certificate for this week's challenge!  Thank you, Daisy!

The center green flower was done using a two way adhesive tape.  I die cut the flower and removed the protective paper, pressed down some avocado netting (you can see it), using the backing.  Make sure you press this in really well.  I sprinkled my first color of Glitter Ritz (I hate glitter), burnished this and then removed the netting to add my second color of glitter.  The other flowers glassine paper embossed and then I added seed beads. 

I can't believe how the time really flies.  My DH took this week off and we have been quite busy, so I was happy to get in the time this AM to work on this!  Hope you all are having a great weekend and thank you so much for stopping by!

Thursday, May 24, 2012

Traveling with Tim's 12 Tags

With not much time to spare, I made it for Tim's May 12 Tags of 2012 and Artistic Outpost's "Traveling." 
All stamps are from Artistic Outpost's Route 66 collection, including the cactus and eat button!  Tim always says it is OK to improvise and so I did!  Did not have pattern tissue paper, so inked up and distress regular tissue wrap.  Did some collage stamping on the tissue paper and then adhered to the tag, then stamped the Motorcycle.  For the button, I had an over sized brad type thing and removed the prongs.  Stamped the Map and then the Eat, cut out with a circular die (right size - so cool).  To fit inside the opening, I also cut an additional grunge piece.  For the word, I used several coats of UTEE.

The cactus was stamped and cut out on grunge paper and again several coats of UTEE.  The little rocky grassy stuff under the cactus is part of the stamp.  After I cut this out, I did little cuts with scissors to break it up and give it a somewhat grass texture.  I also colored this with some green markers and little highlights of green Opalite ink.  It actually as a grassy rock desert kind of look! 

With Memorial Weekend fast approaching, I need to make out my BBQ list.  Whatever you plans are for the weekend, I hope it is a wonderful one!  Thank you for stopping by to have a visit!

Blog Archive