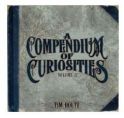
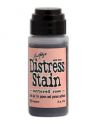
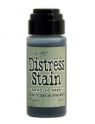
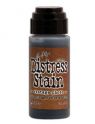
Shattered Stains on page 48 in Tim's book is where our lovely instructor Linda has asked us to turn our pages to for CC2C #5! This is one of my favorite techniques and I have used it on and in so many ways, even using paint brushes to add color just where and how you want it! Now I can't really tell you how I did this, but if you have or buy Tim's book, you will be quite pleased! My little Distressed Stained number will also be linked to Simon Says Stamp and Show "Anything Goes," who also is offering a nice $25 GC to some lucky inker!
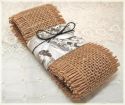
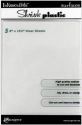
What I can tell you is that I did lots of inking for my backgrounds, tag and frame! All stamps are Tim's. except for the background dress form, which is from Stampin Up. I also used shrink plastic on the sewing on the edge die and I just love that piece! Love it! I used Sharpie Markers to color (even had a silver marker) and added a little thread!
I am embarrassed that I have not been visiting blogs as much, but have been so busy! Had company, DH took time off and then Mother's Day! At the end of the month, we have a graduation out of CA and then I my DD let me know that she booked flights for us to go visit her in mid June! Not sure how to get everything in, but I promise to come and visit you all! Thank you so much for stopping by and enjoy the rest of the week!
Wednesday, May 16, 2012
Thursday, May 10, 2012
Faded Layers!
It was so hard to not participate in CC2C #3, but I just could not squeeze in the time and I am just making CC2C #4 in time! Linda has us opening Tim's book to page 43 to due the Faded Layers technique! What fun it was! Can't really give you all the details out of respect to Tim, but if you don't have his book, go get yourself a copy!
I am also linking this up to Simon Says Stamp and Show Your Favourite Stamp. Well I don't know if this is my favourite stamp, but it is new and certainly a fav! All stamps are Mr. Holtz! The little jalopy and arrow are movers and shapers.
Thank you so much for stopping by today for a visit and I hope your week is fabulous!
Distress Inks: Walnut Stain, Vintage Photo, Pumice Stone, Brushed Corduroy
Archival, Black, Sepia
Clear Embossing Powder
Wednesday, May 9, 2012
Alter It!
My Frilly DT Sister, Sue, is given us the lovely challenge of "Alter It." Last week the Frilly DT did their thing and now the Funkie DT has sprung into action! Now don't be shy and join in, be it Frilly or Funkie, we so want to see you "Alter It." For some fabulous altering ideas and inspiration, stop by Frilly and Funkie! There will be a $15.00 random draw prize to shop at The Funkie Junkie Bouquet and someone will be chosen to proudly display the winner's badge! Just a quick note before I tell you what I did! As part of last week's Friday Focus, Distress Marker's are on special at the bouquet for $76.46. If you are interested, click the link and read all the details. I really love these markers! Linda is always adding new items to her lovely shoppe, so stop by often and see what might strike your fancy!
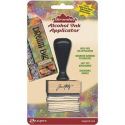
My project was to alter an empty lotion bottle! This is the second bottle I have done, the first one back a couple of years ago. I am also linking this altered bottle to Brenda's "Tuesday Treasures," as I am giving this to my DD and she is a Treasure. I always give non-porous items a light sanding to give the primer more tooth! The primer I use is Kilz, but any would be fine and I will usually give it a couple of coats and same with the push top/cap. I added my choice of alcohol inks, mixative and blending solution to the applicator and applied to the bottle and cap. I did actually use the heat gun to insure this was dry and then I painted on several coats of waterproof gloss varnish. Let dry completely between coats.
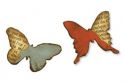
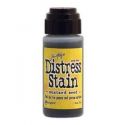
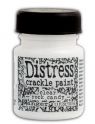
Two of the butterflies were cut from grunge paper and I used the "Shattered Stains" technique from Tim's new book. For the yellow butterflies, I added two way adhesive to grunge paper, removed the backing and added the tissue paper. Once cut, I added Rock Candy Crackle and let it dry and the covered with Distress Stains. The outlines and bodies were also colored with Distress Stain using a little paint brush. After the butterflies dried, I also added a coat of Varnish. The trim was cut Lost and Found paper, using the Vintage Lace die and then I covered that with Rock Candy Crackle paint and cover that in Bundled Sage Distress Stain. Love those stains! All were adhered using Glossy Accents and then covered in several coats of Varnish!
This was a fun project and will last a long time. The first bottle I ever did, using paints, crackle and leaves from my yard is still in perfect condition. Once a year, I might add another coat of varnish, but that is it!
Sorry that I have been MIA! Last week, my DH took some time off and surprised me with a visit from my son and g-daughter, so I was not blogging at all. It was my birthday, yes I kept it quiet, so this was quite a lovely birthday! I do appreciate your visits and promise to catch up this week as long as blogger behaves!
Alcohol Inks: Bottle, Cranberry, Butterscotch, Sunshine Yellow, Gold Mixative, Blending Solution
Distress Stains: Vintage Photo, Tattered Rose, Bundled Sage, Mustard Seed
White Primer, Kilz
Delta, Int/Ext Gloss Varnish
Glossy Accents
Saturday, May 5, 2012
Paris On My Mind!
"Cities Of The World" is the challenge theme at Fashionable Stamping Challenges. If you need a little inspiration, click right HERE to see what my fabulous DT Sisters have created. Come on and join in, pull out those "City" type stamps and get all inky with the FSC gang! Don't forget there is always a chance that you will win a little goodie from Marina's Cottage Crafts.
Since this is also going to visit Simon Says Stamp and Show a Kaleidoscope of Colour, I pulled out a nice assortment of colors in Distress Inks and Markers! The stamps I used are Tim's and the mini Paris tag is from Invoke, which I came across at the Carson Convention. I thought it worked quite well with Tim's stamps! For the background stamp, I swiped several colors of Distress Inks directly from the pad to the stamp. Once I stamped this on my white card stock, I added clear embossing powder and then heat set. Distressed this with Antique Linen and Vintage Photo. The sign and mini tag, I colored with my new Distress Markers and also clear embossed and then added Distress Inks for more color. Both of these were cut using deckled scissors for a little extra interest. Added a little piece of lace (can you see it, Lynne) and a tiny flower! The little butterfly was an Easter Basket goodie from my Hubby!
I can't wait to see what you come up with for "Any Capital City" and you have two weeks, so come on and join in! Thank you so much for stopping by and I hope you will have a wonderful weekend!
Distress Inks: Vintage Photo, Spiced Marmalade, Peeled Paint, Broken China, Antique Linen, Milled Lavender
Distress Markers: Vintage Photo, Spiced Marmalade, Peeled Paint, Broken China, Milled Lavender
Thursday, April 26, 2012
Faux Patina for the Birds
Well I see that Blogger has changed and some of this is difficult for us "young at heart," but old in brain! Anyway Linda is taking us on a new inking adventure at this week's CC2C#2 is all about Faux Patina and you can find all the instructions on page 58 of Tim's book! Angie, a good friend of Linda's, is offering a generous prize for this challenge, so go take a look and join in!
All stamps are from Artistic Outpost and this month their referral program is "For the Birds" and a nice prize is going to go to someone! I used the stamps from Birds of A Feather and Typography. This will also take flight over Simon Says Stamp and Show "Your Favorite Word." Ok, I know there are three words, but it has one meaning!
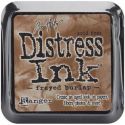
Now out of respect to Tim, I cannot give out any details about the actual technique, but I can tell you a little about the card. The brown frame and background was inked with Frayed Burlap, embossed with Tim's need Texture Fades and then highlighted with Opalite Artic Emerald, covered in clear embossing powder and then heat set. I was looking for a patina look all the way around! The green "Faux Patina" background was embossed and the I highlighted with Archival Sepia, covered in clear EP and heat set.
I hope everyone is doing well and plans for a great weekend! Thank you so much for visiting today!
Alcohol Inks: Pearl, Stream, Bottle, Lettuce
Inks: Archival Coffee, Sepia, Distress Frayed Burlap, Opalite Artic Emerald, Stazon Timber Brown
Wednesday, April 25, 2012
Frilly and Funkie is Recyclying!
Anita is hosting the "RePurpose To UpCycle" challenge at Frilly and Funkie and there will be two winners, one for a $15 gift certificate to The Funkie Junkie Boutique and a favorite pick from the DT to proudly display a winner's badge. For this challenge, you are to use at least two recycled/repurposed items to create an upcycled project. Don't forget to mention which items you used! This challenge runs through Tuesday, May 1st!
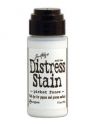
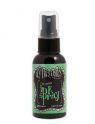
My recycled materials is from a cardboard box and netting from a turkey! I cut the recycled cardboard from a Tim Holtz die and movers and shapers. I then applied Rock Candy Crackle in several areas. Also cut a few branches. Once that dried, I inked with Distress Stains, Old Paper and Vintage Photo and finished with Picket Fence over the crackled areas for a more rustic feel. I did let this dry between applications. The Bird and Branch was cut from Shrink Plastic and I colored with alcohol inks using a small paint brush. On the backside, I added a little extra color with Sharpies. The plaque was sprayed with Dylusions and then embossed using the current technique from Tim's April 12 Tags of 2012. Now for his Bird and Branch, he used grungepaper and embossing powders. I added a little trim from the Vintage Lace die and ran some thread through the holes. The tag background paper is from Tim's Lost and Found.
Through the end of April there is a 50% off shipping for all orders over $75.00 and always a 15% off on Friday Focus products.
It is always a pleasure when you stop by and visit and I do love your comments! Have a great day!
Alcohol Inks: Salmon, Cloudy Blue, Sailboat Blue, Sunshine Yellow, Latte, Blender Solution
Distress Inks: Stormy Sky, Frayed Burlap
White Craft Ink
Clear Embossing Powder
Subscribe to:
Posts (Atom)