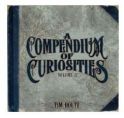
Happy Friday the 13th! Today Linda kicks off the start of "A Compendium of Curiosities 2" challenge with "Custom Foam Stamps" on page 66. Our of respect to Tim, I cannot post instructions, but do recommend his book! Simon Says Stamp is offering a $25.00 gift certificate to one lucky person to help kick things off. I will also be linking this up to Simon Says Stamp and Show "A Lord Holtz Technique."
Unruly PaperArts on Facebook is looking for some altered lids, so I emptied a jar of olives the other day and saved the lid. So for my altered jar lid for UPA, I decided to use this first technique from Tim's book! It is actually a magnet and in the inside of the lid, I added the same glitter glass as on the butterflies body. There are a little collection of shrinky butterflies, which I colored with alcohol inks! I wish you could see the shimmer in the black Dyluslions spray, but we had some pretty nasty storms today and lighting was poor!
Have a great weekend and thank you so much for stopping by!
Friday, April 13, 2012
Wednesday, April 11, 2012
It's All About Words at Frilly and Funkie!
The Funkie side is now having their say at Frilly and Funkie for the "I'll Take Your Word For It" challenge. Use some of those amazing words of wisdom, encouragement, comfort, humor or support, that we all have in our stash, for the focal point in this challenge! For more ideas and inspiration from both the Frilly and Funkie DT, click HERE. There will be a random draw for a $15 gift certificate to The Funkie Junkie's Boutique and a favorite pick from the DT to proudly display a "Winners" badge, so come on and join in on some great fun and vintage inspiration!
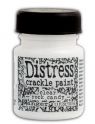
Cut the ATC from grunge paper and chipboard and then used the Mini Labels movers and shapers to cut the frame for my sentiment. Applied Rock Candy Crackle to the grunge paper, let dry and then colored with Distress Stains using Tim's Shattered Stains technique from the new CC#2. The metal corners will colored with Alcohol Inks and then I sanded the raised areas. That awesome Key was also colored with Alcohol Inks, but I used a paint brush to control where I wanted color. The two background layers were run through the Big Shot using the Damask embossing folder and then highlighted for extra texture. For the top tag layer, I applied the tissue wrap using two way adhesive sheets, cut with tag die and trimmed 1/8" all the way around. The tissue wrap was inked, added some crackled areas and did the Spritz and Flick technique as well. All edges were distressed.
This tag is also being linked up to Shar's new blogozine, Unruly PaperArts for the Reader Art Quest 2 challenge, Gingersnap Creations GC144 Copper, Ginger or Rust, Lisa's Bloggers Challenge To Die For, Sizzix and Simon Says Stamp and Show a Lord Tim Technique.
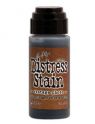
Just to let you know that Distress Stains are on sale for $3.40 through Thursday. Each Friday a new product will be discounted for the entire week for "Friday Focus." Linda is currently offering a 50% reduction in shipping costs for orders over $75.00 and that is in effect until April 30th. New items are continually added, which are priced below MSRP, so visit the Boutique often!
Well I have been working on getting my stamps in order, especially the Tim Collection. Making covers with stamps and inserting it into the plastic sleeves (front and back) 3 ring binders, so I know what I have and where! The stamp sets I place inside of plastic sheet protectors. It is nothing fancy, but I have wanted to do this for a long time now. What do you think? Thank you for stopping by today and I sure hope you are having a lovely week with a little bit of creativity!

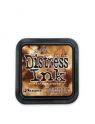
Distress Inks: Vintage Photo, Rusty Hinge
VersaMark Clear Emboss Ink
Clear Emboss Powder
Distress Stains: Vintage Photo, Tattered Rose, Old Paper, Tea Dye, Pumice Stone
Alcohol Ink: Rust, Espresso, Blending solution
Archival Ink: Coffee
Cut the ATC from grunge paper and chipboard and then used the Mini Labels movers and shapers to cut the frame for my sentiment. Applied Rock Candy Crackle to the grunge paper, let dry and then colored with Distress Stains using Tim's Shattered Stains technique from the new CC#2. The metal corners will colored with Alcohol Inks and then I sanded the raised areas. That awesome Key was also colored with Alcohol Inks, but I used a paint brush to control where I wanted color. The two background layers were run through the Big Shot using the Damask embossing folder and then highlighted for extra texture. For the top tag layer, I applied the tissue wrap using two way adhesive sheets, cut with tag die and trimmed 1/8" all the way around. The tissue wrap was inked, added some crackled areas and did the Spritz and Flick technique as well. All edges were distressed.
This tag is also being linked up to Shar's new blogozine, Unruly PaperArts for the Reader Art Quest 2 challenge, Gingersnap Creations GC144 Copper, Ginger or Rust, Lisa's Bloggers Challenge To Die For, Sizzix and Simon Says Stamp and Show a Lord Tim Technique.
Just to let you know that Distress Stains are on sale for $3.40 through Thursday. Each Friday a new product will be discounted for the entire week for "Friday Focus." Linda is currently offering a 50% reduction in shipping costs for orders over $75.00 and that is in effect until April 30th. New items are continually added, which are priced below MSRP, so visit the Boutique often!
Well I have been working on getting my stamps in order, especially the Tim Collection. Making covers with stamps and inserting it into the plastic sleeves (front and back) 3 ring binders, so I know what I have and where! The stamp sets I place inside of plastic sheet protectors. It is nothing fancy, but I have wanted to do this for a long time now. What do you think? Thank you for stopping by today and I sure hope you are having a lovely week with a little bit of creativity!
Distress Inks: Vintage Photo, Rusty Hinge
VersaMark Clear Emboss Ink
Clear Emboss Powder
Distress Stains: Vintage Photo, Tattered Rose, Old Paper, Tea Dye, Pumice Stone
Alcohol Ink: Rust, Espresso, Blending solution
Archival Ink: Coffee
Saturday, April 7, 2012
A Nautical Theme!
So to the Sea we go at Fashionable Stamping Challenges! We want to see your Sea Legs and stamps of course, so come along with us, while we hit the High Seas in search of treasure! Now do remember there is always a prize from Marina at Cottage Crafts. On the subject of treasure, please go see what my lovely DT Sea Mates have created just for your viewing pleasure and inspiration. So here we go!
For the tag background I used Tim's Resist paper and cut a section from the World Map sheet. Boy do I wish that was sold separately, because I use this often from parts. I stamped the Stampin Up star fish in two areas and clear embossed. I then inked the tag starting from the bottom with a brown and working up to my lightest shade of blue. After I ironed away the embossing, I stamped the ship from Artistic Outpost's, "Huck Finn" collection in black Archival. The Lads and Explore, also from that collection, were stamped with coffee Archival. I used Stampin Up Chalks to add some color to the Lads and then a quick spray of Krylon Matte Sealer. Don't want my chalk color to be splashed away. All my little embellishments were colored with alcohol inks!
Distress Inks: Vintage Photo, Evergreen Bough, Tumbled Glass
Alcohol Inks: Espresso, Copper
Sunday, April 1, 2012
AND THE WINNER IS?
A BIG thank you to all of you who joined in my Two Year Blogaversary giveaway and left such kind and encouraging comments. Blogging is such a great tool for sharing our art and meeting new friends! I would also like to thank my new followers and I hope to see you often. So the moment you all have been waiting for!! THE WINNER IS: Christine of Change of Heart! Congratulations, Christine! Send me you mailing details and I will pass it on and your new Distress Markers will go off to you!
Now I was so excited I decided to pull a second name and it is for a $25.00 gift certificate to the Funkie Junkie's Boutique and the shipping is on me! The winner of the FJB GC is Brenda Brown of Bumblebees and Butterflies. Congratulations, Brenda! Pop me an e-mail and I will give you the info you need to shop!
Again I want to extend my appreciation for all of you! Your comments and support mean so much to me in so many ways. Have a wonderful week!
Friday, March 30, 2012
Creative Chemistry 101 Day 10
Each day I have squeezed in the time to watch the new lesson of Tim's Creative Chemistry 101, but have only been able to play a couple of times. Today there was only one tag, so I could not resist. If you have not signed up for CC101, you still can as this is a lifelong class! For this technique I used Tim's new background stamp and I do love it! The bird was cut from one of Tim's Movers and Shapers and the birdcage, print and sentiment are all from Artistic Outpost's, "Birds of a Feather." We are joining in Lisa's Bloggers Challenge - For the Birds , Beverly's "Pink Saturday" and Simon Says Stamp and Show A Tag.
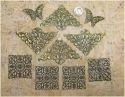
Before I tell you about how I made the tag, Linda Coughlin, has a wonderful product review for Frilly and Funkie's Friday Focus. It is all about altering Filigree Metal Embellishments, which are on special for 15% off and if you use MARCH10, you can take advantage of an additional 10% off. I could not help but notice there were a few other precious metals on special, so go take a look and you might just see something you would like! When I saw what she did, I knew what I would be adding to the top of my tag! Let's face it I love the grunge, but also love to add a touch of pretty and these little pieces of metal are just that!
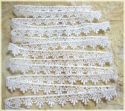
I did my tag background via the instructions for today's CC100 class. The little ribbon trim I colored using Tattered Rose Distress Stain and added some pearls. The filigree metal, I colored with alcohol inks, then pressed into Worn Lipstick Distress Ink and then clear embossed. I really liked how it turned out and have a not so good, before and after picture. I stamped the birdcage and sentiment using two colors of ink as Tim did this AM. Stamped the print background with Vintage Walnut on newsprint and torn.
Well that is it for today and if you ever have any questions about something I did, please just ask. As many of you know, it never bothers me to share something. It is hard to put down every little thing and it would make for a boring read! Just a reminder that the Frilly and Funkie Challenge Blog is having the first ever challenge and it is all about Your Favorite Vintage Style, so we would love to see you join in the fun! I was so thrilled to see so many of my lovely blogging friends sign up as followers and can't wait to see you join in the challenges! Have a wonderful weekend and thanks ever so much for your visits and comments!

Distress Inks: Worn Lipstick, Vintage Photo, Walnut Stain
Distress Stains: Picket Fence, Tattered Rose
Alcohol Inks: Mountain rose, Pearl
Distress Stickles: Rock Candy
Before I tell you about how I made the tag, Linda Coughlin, has a wonderful product review for Frilly and Funkie's Friday Focus. It is all about altering Filigree Metal Embellishments, which are on special for 15% off and if you use MARCH10, you can take advantage of an additional 10% off. I could not help but notice there were a few other precious metals on special, so go take a look and you might just see something you would like! When I saw what she did, I knew what I would be adding to the top of my tag! Let's face it I love the grunge, but also love to add a touch of pretty and these little pieces of metal are just that!
| Altered on the left! Cool! |
Well that is it for today and if you ever have any questions about something I did, please just ask. As many of you know, it never bothers me to share something. It is hard to put down every little thing and it would make for a boring read! Just a reminder that the Frilly and Funkie Challenge Blog is having the first ever challenge and it is all about Your Favorite Vintage Style, so we would love to see you join in the fun! I was so thrilled to see so many of my lovely blogging friends sign up as followers and can't wait to see you join in the challenges! Have a wonderful weekend and thanks ever so much for your visits and comments!
Distress Inks: Worn Lipstick, Vintage Photo, Walnut Stain
Distress Stains: Picket Fence, Tattered Rose
Alcohol Inks: Mountain rose, Pearl
Distress Stickles: Rock Candy
Wednesday, March 28, 2012
Vintage Style at Frilly and Funkie!
Finally the first day of a brand new challenge and challenge blog is here and I am so proud to be on the design team for Frilly and Funkie Challenge Blog. For our first challenge Frilly and Funkie are wanting to see YOUR FAVORITE VINTAGE STYLE. There are so many ways to interpret "vintage" and for a great treat and a little extra inspiration stop by F&F and enjoy what the design team has in store for you! All the information about challenge guidelines and prizes and be found HERE. For a chance at a $25.00 gift certificate to "The Funkie Junkie Boutique," read all the details HERE. I sure hope you like my first DT submission for my "Favorite Vintage Style" and we can't wait to see Your Favorite Vintage Style!
Guess I will start with what you see first! I cut the dress form from grunge paper after covering with double sided adhesive. Used a craft knife to gently cut areas on the cut dress form as I wanted to keep areas separate for the embossing. For the bodice of the dress form, I used Tim's Mosaic Technique and then covered the grout area with Peeled Paint, removed the piece of paper for the waistband and added the gold and then finished off with the Vintage Photo. Heat embossed and then added the Glossy Accents to the tiles. The little spools, so darn cute, were colored using Distress stains and a tiny paint brush.
The cabinet frame was cut from grunge paper using the Vintage Cabinet Card and VC Movers and Shapers. I followed the technique from Tim's CC#2, "Shattered Stains," page 48 for the frame. I highly recommend this book! For my background I used a natural ivory paper, which was cut from the Vintage Cabinet Card and clear embossed images from Tim's Haberdashery stamp set. Once this was heat set, I inked all over with Distress Inks and a quick spray of Glimmer Mist! Normally I would use my own mix of Perfect Pearls, Reinker and Water, but did not have a light color mix ready! Used the patterns embossing folder, ran it through the Big Shot and then quickly highlighted the raised area with Stazon Timber Brown. Covered this clear embossing powder and then heat set. The inking and embossing process has to be relatively quick for the embossing powder to adhere. Added the little vintage sewing goodies, place the cabinet on natural ivory paper and card base. This was a fun, fun project!
Until the end of March, by using code "MARCH10," you can enjoy and extra 10% off Linda's already reduced prices. There are so many unique and lovely products and a great collection of Ranger products with so many more arriving soon! We all shop and sometimes until we drop, so take a look and you will be pleasantly surprised at the array of vintage goodness!

Inks: Distress Rusty Hinge, Broken China, Vintage Walnut, Bundled Sage, Stazon Timber Brown, Versamark Clear
Distress Stains: Broken China, Bundled Sage, Wild Honey
Embossing Powders: Stampin Up Gold, Distress Peeled Paint, Vintage Photo, Clear
Glimmer Mist Pearl
Rock Candy Crackle Paint
Guess I will start with what you see first! I cut the dress form from grunge paper after covering with double sided adhesive. Used a craft knife to gently cut areas on the cut dress form as I wanted to keep areas separate for the embossing. For the bodice of the dress form, I used Tim's Mosaic Technique and then covered the grout area with Peeled Paint, removed the piece of paper for the waistband and added the gold and then finished off with the Vintage Photo. Heat embossed and then added the Glossy Accents to the tiles. The little spools, so darn cute, were colored using Distress stains and a tiny paint brush.
The cabinet frame was cut from grunge paper using the Vintage Cabinet Card and VC Movers and Shapers. I followed the technique from Tim's CC#2, "Shattered Stains," page 48 for the frame. I highly recommend this book! For my background I used a natural ivory paper, which was cut from the Vintage Cabinet Card and clear embossed images from Tim's Haberdashery stamp set. Once this was heat set, I inked all over with Distress Inks and a quick spray of Glimmer Mist! Normally I would use my own mix of Perfect Pearls, Reinker and Water, but did not have a light color mix ready! Used the patterns embossing folder, ran it through the Big Shot and then quickly highlighted the raised area with Stazon Timber Brown. Covered this clear embossing powder and then heat set. The inking and embossing process has to be relatively quick for the embossing powder to adhere. Added the little vintage sewing goodies, place the cabinet on natural ivory paper and card base. This was a fun, fun project!
Until the end of March, by using code "MARCH10," you can enjoy and extra 10% off Linda's already reduced prices. There are so many unique and lovely products and a great collection of Ranger products with so many more arriving soon! We all shop and sometimes until we drop, so take a look and you will be pleasantly surprised at the array of vintage goodness!
Inks: Distress Rusty Hinge, Broken China, Vintage Walnut, Bundled Sage, Stazon Timber Brown, Versamark Clear
Distress Stains: Broken China, Bundled Sage, Wild Honey
Embossing Powders: Stampin Up Gold, Distress Peeled Paint, Vintage Photo, Clear
Glimmer Mist Pearl
Rock Candy Crackle Paint
Subscribe to:
Posts (Atom)