Saturday, October 22, 2011

Coffee And Cream With A Hint Of

So much fun the DT had working on "Coffee And Cream With A Hint Of" at Fashionable Stamping Challenges!  Stop by FSC and she what my talented DT sisters came up with!  The "Hint" is dark chocolate.  Now you can go with colors or as I did, "Coffee and Cream"  literally!  Please come and join us with a cup of coffee or tea for some stamping fun!   We are also linking this up to Creative Inspirations "Monochromatic."
For this tag, I pulled out my stamps related to the "Coffee and Cream" theme!  The stamps are from I Brake For Stamps.   I wanted to create a "faux designer paper," which is a technique from the Technique Junkies, so I combined several of the stamps to create the background.  The coffee grinder was stamped, cut out, colored and then clear embossed.  I also did a little stamping on the coffee grinder.  Added a little tag using Mr. Holtz tags and tickets die, stamped on some cream colored crinkle ribbon and finished it off with the cappuccino bakers twine!  I even tied a successful bow!
Marina from Cottage Crafts is our sponsor and look at the lovely stamps you could win just by joining the challenge at FSC!  I wish I could join! 

I just found out that I was voted as one of the "Spotlight Artists" over at City Crafters Challege Blog for this! 
Paper:  Stampin Up Chocolate Chip, Creamy Caramel, Very Vanilla
Inks:  Stampin Up Creamy Caramel, Chocolate Chip, Stazon Timber Brown
Markers:  Stampin Up Creamy Caramel, Close to Cocoa

Thursday, October 20, 2011

Ravens and Stripes, Oh My!

Mr. Dapper Bones and Pet Raven are going a Haunting at Gingersnap Creations GC123 "Ravens" and Simon Says Stamp and Show some "Stripes" and Anything Goes "To The Letter." Yes this took more than 10 minutes!  All stamps are from Artistic Outpost's "Haunted Halloween" collection. 
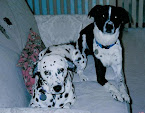
So here is what the little voices were telling me what to do!  What the voices don't speak to you??  Well come times I have the Molly voice screaming at me to get her lunch and she really does scream!  Back seven years ago when we first rescued her, one day I heard this horrific scream and ran to see what was wrong!  I never knew a dog could actual scream!  OK, back to the business of ghoulish details!  Using my Stampin Up "tasteful trim" Sizzix die, I cut the rick rack from 3M Safe Release tape.  This works very well and is safe!  I added masked stripes across the tag and pressed down to secure.  I then used several shades of Distress Inks, covered with clear embossing powder, removed the mask pieces and then heat embossed.  The masked areas were covered with Black soot, wiped off the excess and then did the Batik technique.  Bones and Raven were inked with Black Archival, heat set and then I colored open areas with Distress Inks.  The little tag topper and sentiment were stamped in Black Craft, clear emboss powder and then heat set.  I added Distress Inks to these.  A little trim and tiny skull for finishing!   I could have just stamped Bones and Raven on the tag, but I really wanted a little dimension, even on a mostly flat tag!  The tag was backed with black and then distressed! 

Just a reminder for any of you who use Artistic Outpost stamps, each month they have a referral program and there is a prize!  We love prizes!! 

Well I can't believe that tomorrow is Friday!  Hope you all are having a great week and even a better weekend!  Thank you so much for stopping by!

Tuesday, October 18, 2011

Grungy Monday and Anything Goes!

Our "Grungy Monday" fearless leader, Linda, gave us one heck of a challenge!  Tim in 10!  Not Tim is a 10, but to actually do a project from start to finish in 10 minutes!  Now we did get to pull out supplies and think, which can be a challenge for us "fly by the seat" kind of crafters!  Now I will admit, that I had more things out and just ran out of time, so here it is!  I am also playing for the first time with the lovely people over at Anything Goes with a challenge of "To the Letter."


The 10 Minute Supplies
 We quickly die cut the bird and fence, took these and the tag to the craft sheet!  Inked the tag, ran this through the embossing folder and then inked the tree!  Next we quickly added Rock Candy Crackle to all three and did cheat and used the heat gun, remembering that we are looking for 10 minutes!  Ran black and orange ink over the cracks and quickly wiped this off!  Glued down the fence and crow and added some of Tim's fabulous stickers, using the word "Boo."  Added and eye and backed the tag with another black tag and then distressed.  Oh I did kind of glob on my ink and crackle as time was of the essence!  Thank you Linda, but could you give us Tim in 20 next time?  He!He!

Here is a lovely surprise that I received from Lululizinlalaland for her "Back from France" giveaway!  She even included a lovely tag!  Thank you so much, Liz! 

Thursday, October 13, 2011

Black and Cream with Wings!

City Crafter's #78 is a Boo-tiful Color Challenge asking for Black and Cream and Simon Says Stamp and Show is looking for Things with Wings.  The wings, dress form and part of the tag background were created using Victorian Lace from Stampin Up, all other stamps are Tim's Holtz Papillon set.

The dress form was cut from black chipboard and highlighted.  I cut another form from cream colored paper, clear embossed and then covered with Black, removed excess ink and then ironed off the embossing powder.  The Angel Wings from Sizzix were cut from black shrink plastic and stamped with craft ink and then heat shrunk.  BTW, embossing powder does not work, but craft ink does!  Think you know how I figured that one out!  At first the wings were going to go the the arm sides, but I really liked the look of them like shoulder pads!   The background tag was first stamped with SU Victorian Lace, using Antique Linen.  Next I stamped with Pumice Stone using the larger background stamp from the Papillon set and then some butterflies with Scattered straw.  Added some of the tissue tape, which I always forget about! 

I can't believe it is Thursday and I can't help but wonder what I did all week!  Hope you all are having a creative and fun week!  Thank you so much for stopping by today!

Inks:  Distress Antique Linen, Pumice Stone, Scattered Straw, Black Soot, Craft White, VersaMark

Monday, October 10, 2011

Bloggers Challenge if Falling for Grungy Monday!

Grungy Monday is back, baby!  Linda gave us a Holtz-ian Halloween theme, using one or more Tim Holtz products and Lisa's Bloggers Challenge is Falling for You!  Now to me the "pumpkin" is also all about Halloween.  So here is how this goes!

I made a wreath with "Falling Leaves" that were cut from a free digi background image that June of Dezinaworld so nicely offered!  When I first saw this background, I knew I would use it for leaves!  After I cut the leaves using Tim's Autumn Gatherings, ran them through the crimper, highlighted and shaded using various Distress Inks!  I also cut branches and acorns from the same die!  I wanted a more realistic look to the acorns, so I cut these using Creamy Caramel and then shaded the nut portion with Wild Honey and Spiced Marmalade, shaded the stem part with Vintage Photo and just around the very edge of the nut!  Dried and then added Rock Candy Crackle to the stem portion!  Filled in the cracks with Golden Mist Opalite and a quick cover over the nut!  The Pumpkin was cut from chipboard and Pumpkin Pie, colored the stem, covered with Rock Candy Crackle and then added Spiced Marmalade.  The back panel sides were embossed with one of the new Texture Fades borders.  The center pumpkin is a new Movers and Shapers from the man!

June's Digi Background
Wishing you all a great week and your visits and comments are so appreciated!

Distress Inks:  Wild Honey, Spiced Marmalade, Dusty Condord, Fired Brick, Shabby Shutters, Vintage Photo, Walnut Stain,
Opalite: Golden Mist Ink, Adironadack Lettuce Marker, Rock Candy Crackle
Stampin Up Paper, Always Artichoke, Pumpkin Pie, Chocolate Chip, Whisper White

Saturday, October 8, 2011

Altered Halloween Cigar Box and the TJ Winner!

"Anything But A Card" is the newest challenge at Fashionable Stamping Challenges!  There is a ton of stamping, which of course is a must to enter FSC, painting, inking, decoupage, etc.  My altered box will also be entered in Gingersnap Creations GC121 Horror Stories, Bella Creations Voila Group "No Paper" and City Crafter Challenge Blog for 3D!   This mixed media was actually worked on for three days, some for drying reasons and layers and layers take time!  Some areas I used tissue paper for texture and added Rock Candy crackle here and there after painting, which was highlight with Opalites.  Had to add a few Shrinky Dinks and of course my moulded skulls, which I made from Lucy's very informative course!  I so can't wait for her tissue class!  All stamps are from Artistic Outpost and boy did they work so well for this box!  Let me get started and I sure hope I don't bore you with too many details, but this is going to be a long one!  Sorry! 
First I took the cardboard grape flavored cigar box that my DH found for me and painted it orange, then I stippled on some black.  I did this to hide the background color.  The areas I wanted to use tissue paper on, I then covered with Mod Podge, crinkled the tissue paper and then straighten out a little, added it to the wet MP and flattened.  Some areas I wanted more crinkles, so pushed it together.  After that dried, I covered it with MP.   That was done on the top and inside box lid and the front box panel.  I painted all the panels starting at the bottom with black working up to the lighter colors and orange was the finishing color.  After I painted a small area with the black, I used the dirty brush, went up a little and then work down into the black and this was then repeated with each color.  I did add little splashes of color here and there as I wanted.  I did use MP to cover all painted and finished areas including the inside of the box.  If I leave off anything and you want to know, please pop me an e-mail. 
Box Lid Top:  After tissued and painted, I stamped the Skeleton with Craft White and then heat embossed and added a layer of MP.  While still wet, I added the haunted house which had been stamped on tissue paper with Stazon Black and then cut out.  Cover this with yet another MP layer, while wet, the fencing cut from black and highlighted with Opalites was added.  Another layer of MP.  Everything that was done, was always coated again with MP, so I won't keep repeating.  Inside Box lid is pretty self explanatory.  The witch and cat were cut from Tim Holtz dies, along with the bats and spider! 
Box Inside:  Cut Stampin Up designer paper, the bottom panel was embossed with Tim's folder and then highlighted and dried.  Covered with MP!  A little black trim was added on the top.

Box Sides:  Cat, Owl, Witch were stamped with Black Craft and then clear embossed.  Branches were cut with Tim's new Sizzlits die in black, ran through my new crimper, highlighted with Opaliltes, then flattened.  The Witch and Bottles side panes were stamped on tissue paper with Black Craft, clear embossed and then colored on the reverse side with Stampin Up Markers.  These were cut and then added again to a layer of MP, when that dried, another MP layer.   All embellishments were glued down with Glossy Accents.  BTW, the banner is also an Artistic Outpost stamp that was shrunk!
And the winner of a full ONLINE YEAR of the Technique Junkies Newsletter is, Jack.  Please send me an e-mail with your e-mail, full name and mailing address.  Thank you all for stopping by today with this very long picture and blog post.  Just did not know how to shorten it!  Have a wonderful weekend!  Here is the winner and a picture of the supplies I used!!!

Saturday, October 1, 2011

Mr. Pumpkin Head!

Mr. Pumpkin Head came about after Lisa's, Bloggers Challenge, "sketch"  theme for this week!   I really enjoy the challenge of sketch!  Simon Says Stamp and Show is for Men Only and this corny dude makes the cut!
I knew I wanted to use my new Halloween Treats stamps from Artistic Outpost, so I started with what I decided would be the focal point!  He was stamped with Black Archival ink on yellow cardstock, heat set and then I used Stampin Up's Pumpkin Pie Marker to color in some of the areas! A rick rac ribbon trim was die cut and then the bats from Haunted Halloween were stamped.  All background panels were embossed and highlighted using a technique from the Technique Junkies.  I stamped the spider and sentiment prior to embossing!   For my flourish, I decided to go with a feather in his hat and cut some black open weave ribbon trim in strips.  The feather was gifted to me by my rotten bird, Fred!  You know Fred turned 24 in August.  He may actually be the oldest living Patagonia!
Thank you for stopping by today and I wish you a wonderful weekend! 

Friday, September 30, 2011

Lucy's Online Mould Class!

Since I came across Lucy's True Colours blog, I have been an admirer of her unique work and art creations!  Not at all that there aren't a ton of fabby blogs and artists, but Lucy just does some incredible projects that really capture my interest!  Every once in awhile, after drooling over a new project, I would mention to her about teaching a class.  I believe I was not alone and so now Lucy is offering very reasonable priced online classes.  If interested really check it out, but first stroll through her blog and you will know why I wanted classes!!   Nest there will be a class using tissue paper techniques!  So fun!!!
The Moulded Subjects
The Clay Moulded Pieces
The Finished Pieces
Products Used to Color
The first in the series is mould making and I will admit that I was afraid to start!  Why, I don't know!  Now please keep in mind that the pictures are not the best quality, because there is quite a bit of reflective materials used and this is my very first attempt at making moulds, playing with clay and coloring.  The colors IRL are darker and do look nicer.  I really had a blast and can't wait until I actually perfect a skill at this fun craft!  All but the second cameo (copper/green) were colored prior to baking.  These were just done for fun and practice, so not sure how I will use them.  I also bought some moulds, but how interesting to look at object you like and then make a mould of them!!  Thank you Lucy for such a fun and informative class!

Speaking of classes, Cindy of Whimsical Musings, is offering a free online seminar for us bloggers, "Blogging 101."  Cindy is always generous with her time and shares all of our talents with so many other lovely bloggers!  Now she is sharing some tips and ideas for blogging, so stop by Cindy's!

Wednesday, September 28, 2011

Baby Shower

This was just a quick, well sort of, baby shower card.  All stamps are from I Brake For Stamps.  I inked the images with different shades of pink and then clear embossed. Filled in some areas with several pink colored markers and then highlighted with Spica clear glitter pen.  Nothing fancy at all in this one, but it does actually look better IRL!

Just a reminder if you are interested in a chance to win a One-Year Online Subscription to the Technique Junkies  Newsletter, click here!

Have a great day and thank you kindly for the visit!

Monday, September 26, 2011

Men and Crimpers!

Simon Says Stamp and Show is wanting "Men Only" and Gingersnap Creations GC118 has us using our crimpers!  BTW, I did not have a crimper and had been thinking about one, so used a Michael's 50% off coupon!  What an excuse, but these are fun and sure gets the little brain going!  All stamps are from Artistic Outpost and I used Apothecary which is new and Ephemeral Backgrounds.
I first stamped the bottle with Stampin Up Craft Black, clear embossed and then cut it out.  I actually cut out a second bottle for support.  A Spellbinders die was used to cut out the center for my picture placement.  The pharmacist was stamped using Black Stazon Ink, he was masked and the wording was colored using DI Brushed Corduroy, along with the bottle cork!  The RX was stamped used Stazon Timber Brown, cut out and distressed with Forest Moss.  The Rx label was stamped with Brushed Corduroy and Liquid Luck with Forest Moss, as was Apothecary, which along the Rx and 10c was stamped on Newspaper Print!  On the black background, I crimped, flattened and then stamped the Antique Ledger in Stampin Up Craft White.

I also did some curling of the edges, which is a technique from the Technique Junkies.  If you are interested in a chance to win a ONE YEAR ONLINE SUBSCRIPTION, please click on the sidebar link and leave a comment.

Thank you for visiting and committing today and I hope your week will be wonderful!

Blog Archive